Preservation and storage methods
On this page
Introduction
As insects are so diverse in their form, there are many ways they can be preserved.
Some of these methods depend on the specific order of insect, but can also vary based on the country of the collector and their personal preferences.
Insect collections are mainly comprised of:
- dry-preserved specimens - specimens that are pinned and card mounted, curated into drawers and housed in cabinets
- slide mounted specimens - specimens stored in boxes or cabinets
- wet-preserved specimens - specimens stored in spirit, usually 75-80% IMS (Industrial Methylated Spirit) or 100% ethanol
These different methods each have their own set of challenges, particularly in terms of conservation.
Causes of deterioration
Without correct preparation, quality storage and regular monitoring, entomology collections can deteriorate rapidly.
The main causes of deterioration are:
- physical damage - dried out spirit collections or specimens mounted with the wrong pins or glue
- pest attacks
- light exposure - UV rays can cause fading
- moisture - high relative humidity can cause mould growth
Over the course of this training, we will guide you through the modern curatorial standards required for each type of collection to address these issues.
Nightmare material: a collection destroyed by pests.
Dry-preserved specimens
The bulk of most entomology collections are dry-preserved. There are a variety of different dry-preservation methods, including direct pinning, micro-pinning, carding and pointing. Microscope slides can also be used.
Direct pinning
This is the most common dry-preserved method.
It is suitable for many insect orders, including:
- Diptera (flies)
- Coleoptera (beetles)
- Lepidoptera (butterflies and moths)
- Hymenoptera (bees and wasps)
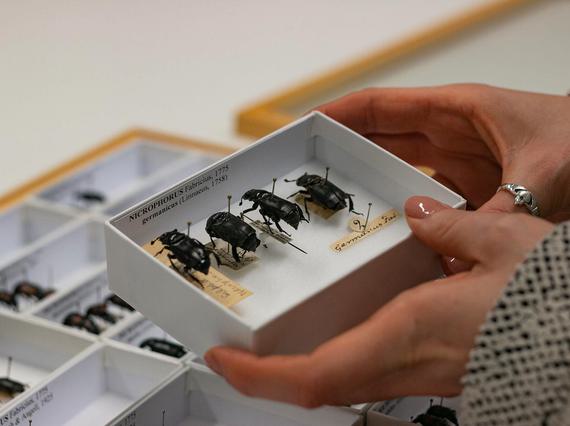
Specimens are pinned through the thorax on a single long pin with data labels added to the pin below the specimen.
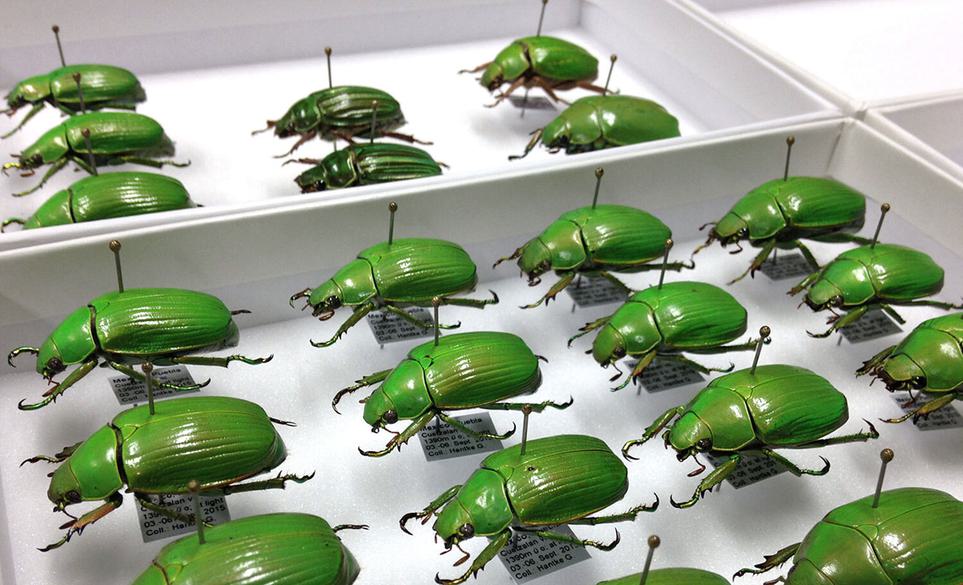
Direct pinned scarab beetles.
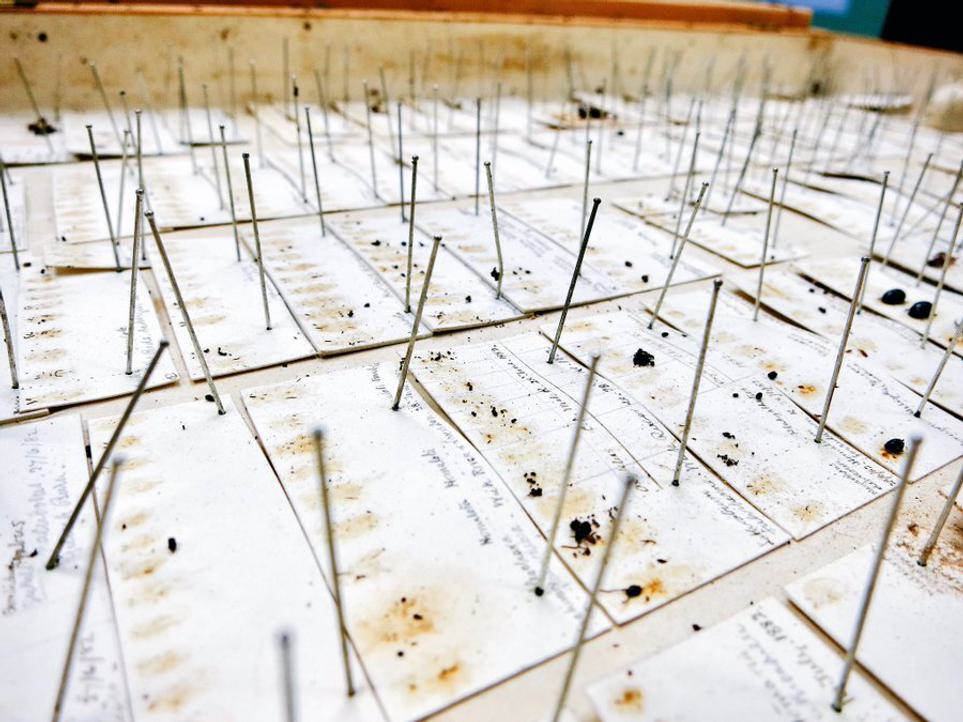
Micro-pinning
This method is often used for small specimens. The specimen is pinned with micro-pins and then staged up on a large pin with a foam strip. Data labels are added to the large pin beneath the staged specimen.
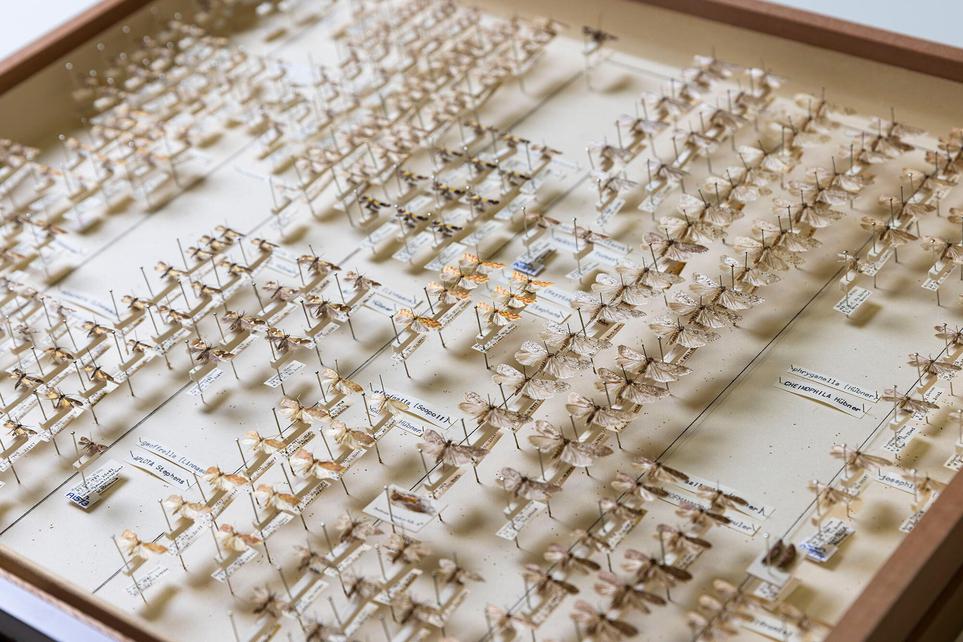
Examples of micro-pinned moths.
Carding
This method is best for:
- Coleoptera (beetles)
- Hemiptera (true bugs)
- Specimens with delicate legs and antennae
- Tiny specimens too small to take a pin
The specimen is glued onto stiff card with the legs and antennae spread out. A pin is then put through the card and data labels pinned below.
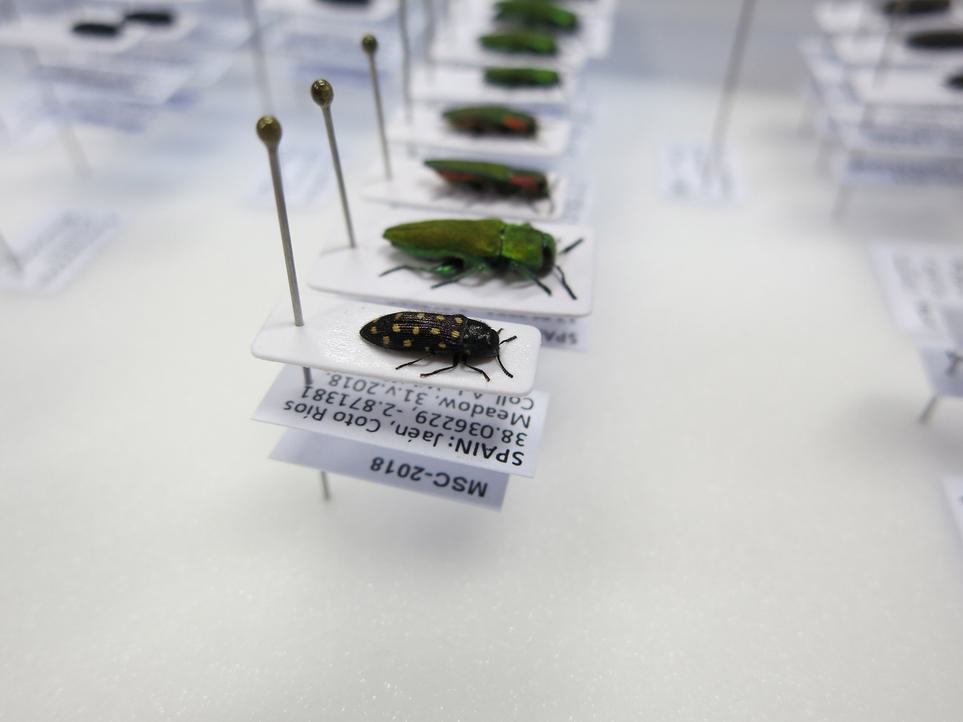
Carded Jewel beetle specimens.
Pointing
This is another method used for smaller insects such as small wasps, ants, flies and beetles. It involves gluing the specimen onto the tip of a small triangular piece of card and has the advantage of not obscuring the underside characters.
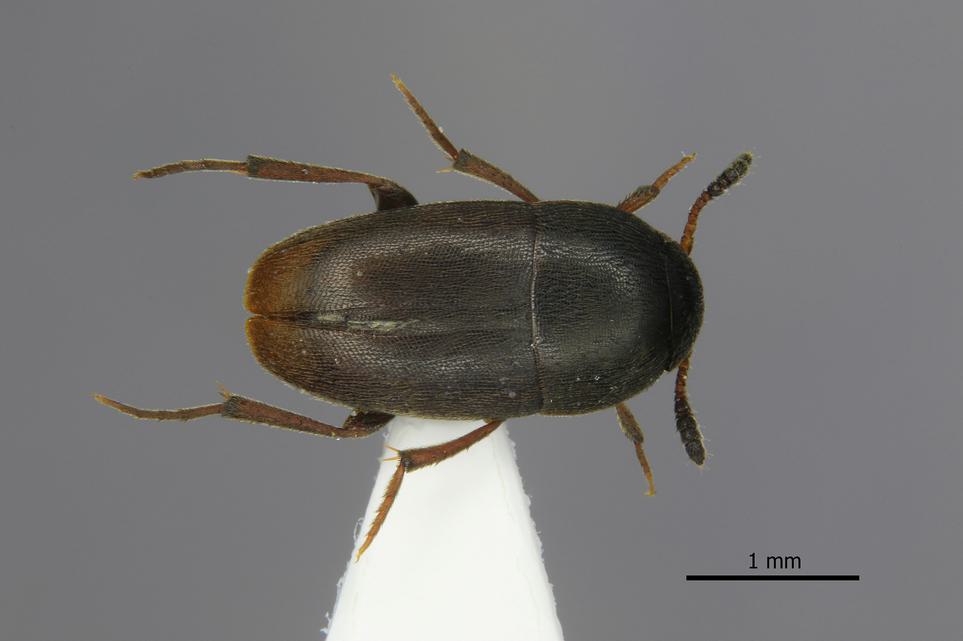
Card pointed beetle (Leiodidae: Ptomaphagus sericatus).
Learn how to prepare these different methods in the Specimen preparation and conservation section of this training.
Papered specimens
Pinning specimens when they’re fresh is preferred but not always possible. In these situations, a long-established method known as ‘papering’ has been used for larger specimens, including:
- Lepidoptera (butterflies and moths)
- Odonata (dragonflies and damselflies)
- Neuroptera (lacewings, antlions and mantidflies)
- Some other groups
Papering involves placing the specimen flat, with wings folded together dorsally in a small envelope. These are sometimes rectangular envelopes made from glassine or plastic. Older examples are handmade triangular envelopes made from newspaper.
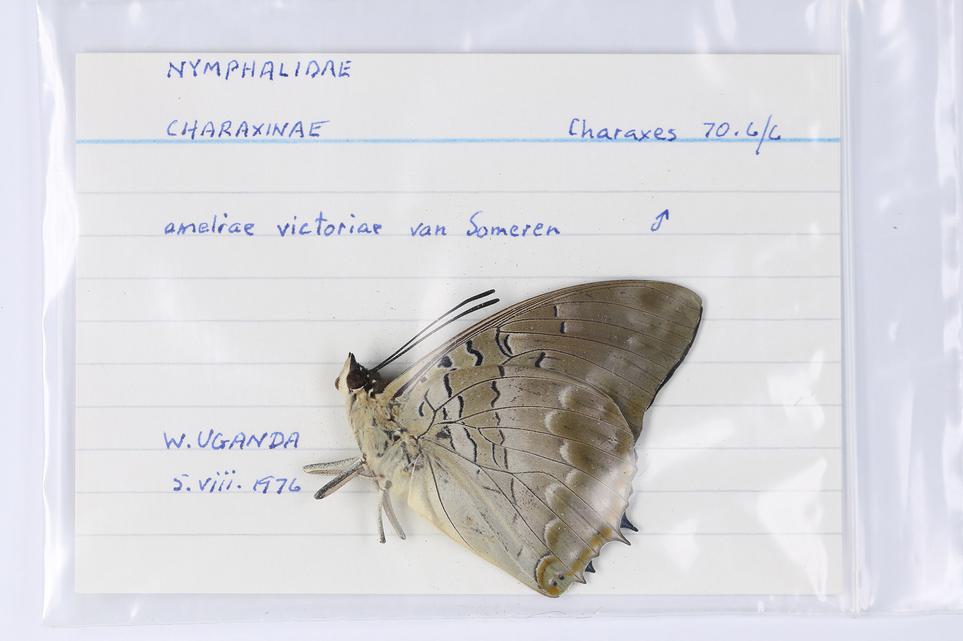
A papered butterfly specimen in plastic envelope.
This method is mainly used in the field as a temporary method of storage and transportation. The specimens can then be relaxed, pinned and spread later. Generally, papering is not ideal for long-term storage, as accessing the specimens risks damage. Insects that are papered can have flattened bodies and broken legs, antennae or palpi (mouthparts).
However, if papered collections are well curated, they may have the benefit of saving space in the collection. Some curators have developed new workflows to digitise papered Lepidoptera collections and store them semi-permanently in glassine envelopes, mounting only those that are considered essential. Refer to the additional resources at the bottom of this page to read more about this method.
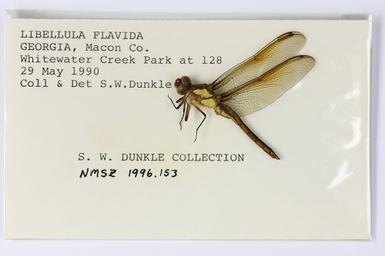
Example of a papered dragonfly specimen.
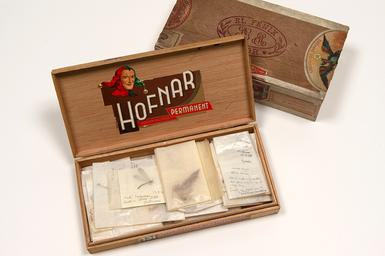
Example of papered specimens stored in a wooden cigar box.
Example of papered Odonata specimens.
Microscope slides
Many small insects (such as aphids, fleas, thrips, parasitic wasps, and others), and small details of larger insects, are specially prepared and placed either temporarily or permanently on microscope slides. This allows them to be examined under a compound microscope at high magnification.
Specimens can be prepared in a liquid, solid or dry mount and fixed to glass, wood or plastic slides. Microscope slides can be transparent for light microscopy or opaque for reflected light.
The storage methods for microscope slides must be correct for the type of slide collection you have. Thin permanent mounts can be stored vertically, like a card index. Other slides that contain liquid or thick media mounts must be stored horizontally, as gravity could cause them to leak or move if stored vertically.
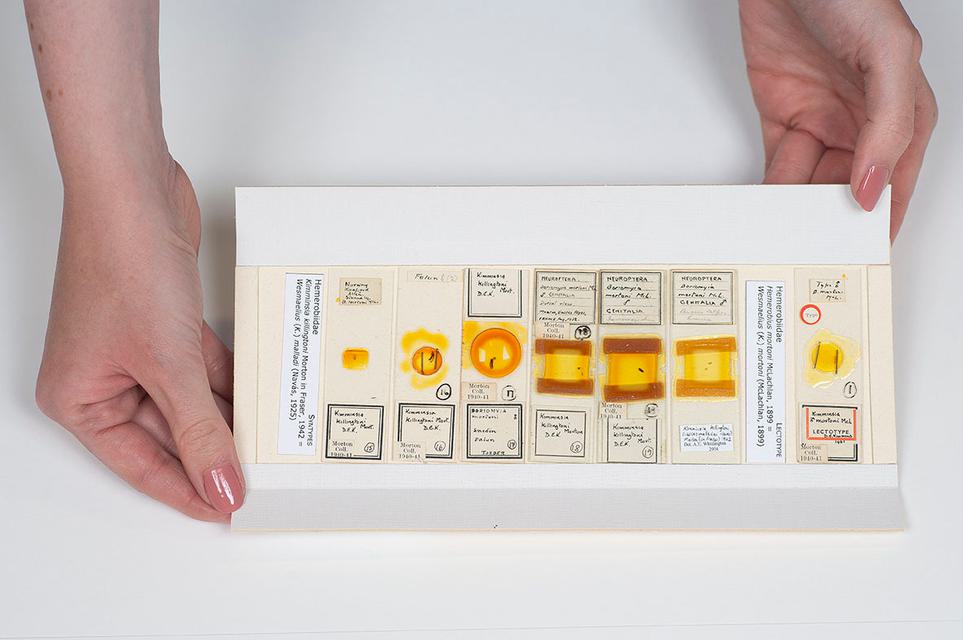
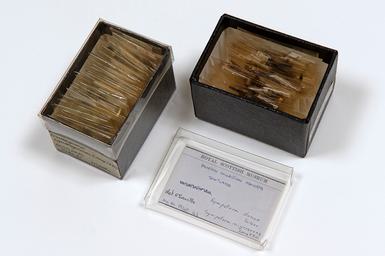
Some slides are stored horizontally on card inserts that fit within archival boxes.
Microscope slides pose conservation issues, as many mounting media used previously are now drying out, shrinking, crystallising and even eating the specimens. Refer to the additional resources at the bottom of this page for more advice on managing slide collections.
Wet-preserved specimens
Specimens immersed in fluid preservative include:
- soft bodied insects such as mayflies and barklice
- invertebrates such as Arachnids (spiders)
- most immature stages of insects
This is because their key diagnostic characters would be obscured if they were dried.
In most cases, the fluid used is either 75-80% ethanol or Industrial Methylated Spirit (IMS). This dehydrates the specimen and maintains the state of preservation so it does not deteriorate. For immature stages of insect, some entomologists prefer Kahle’s solution. If DNA preservation is the goal, then absolute ethanol is used as this will not interfere with the molecular structure of DNA.

An example of insect specimens preserved in IMS.
Wet-preserved specimens are stored in glass in a dark and cool environment (about 10°C), to reduce the rate of evaporation. The individual specimen vials filled with fluid are housed and inverted within another larger glass jar. This creates a double barrier and makes re-spiriting easier.
Wet-preserved collections require constant maintenance, or they will rapidly deteriorate. Fortunately, most specimens can be rescued from a semi- or nearly totally desiccated condition by a trained conservator.
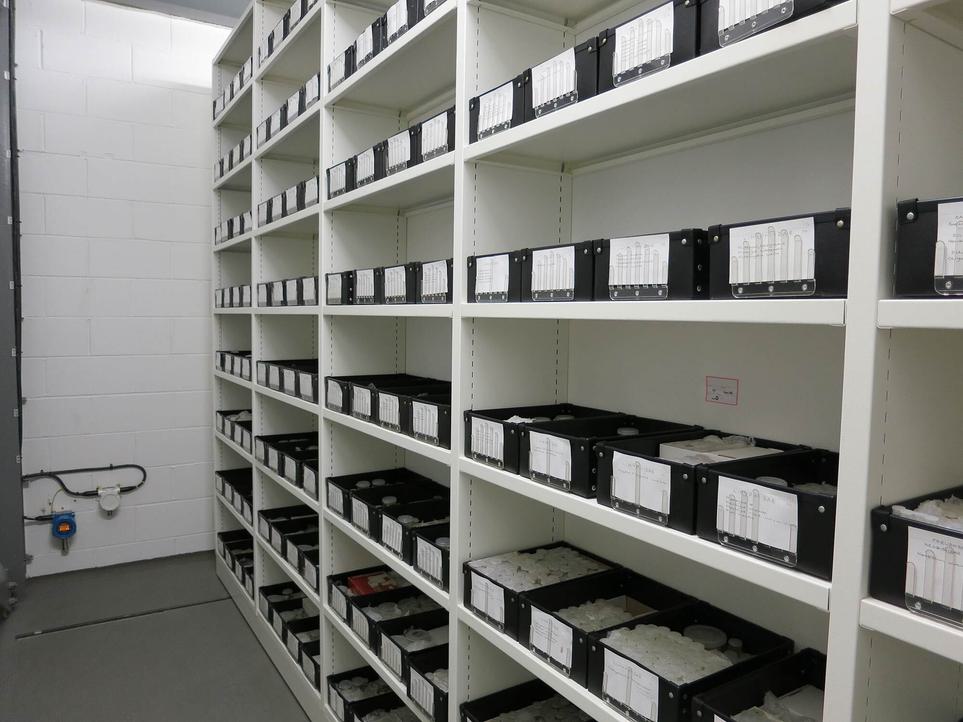
Mobile racking in the wet collection at the National Museums Collection Centre.
Maintaining fluid preserved collections can be challenging and comes with health and safety concerns, as both IMS and ethanol are highly flammable. Ideally the level of alcohol vapour in the store or collections area should be closely monitored.
Further advice on management of fluid-preserved collections can be found in the additional resources at the bottom of this page. If your institution has wet-preserved specimens that you are unsure how to care for, we recommend you get in touch with a trained conservator for advice. You can search for conservators near you via the ICON Conservation Register using the search term ‘natural history’.
Storage methods
Entomology collections are generally arranged taxonomically, with closely related species kept together. This means that if a collection is not fully catalogued, specimens can be located easily and readily compared with similar ones.
Tip: Think about the value of your collection when considering storage. If it possesses good data or has historical value, it is worth investing in quality storage.
Watch this video to learn about the different types of storage that can be found in entomological collections.
Drawers
Ideally, glass-topped drawers are the best way to store your collection, as the contents can be viewed without removing the lid.
Modern drawers should be:
- air-tight to prevent pest infestation
- deep enough to take modern standard 'continental' pins (38mm long)
- lined with plastazote substrates rather than cork, which can shrink
- made using suitable wood- avoid wood such as oak, as off-gassing can occur which may be harmful to specimens and labels
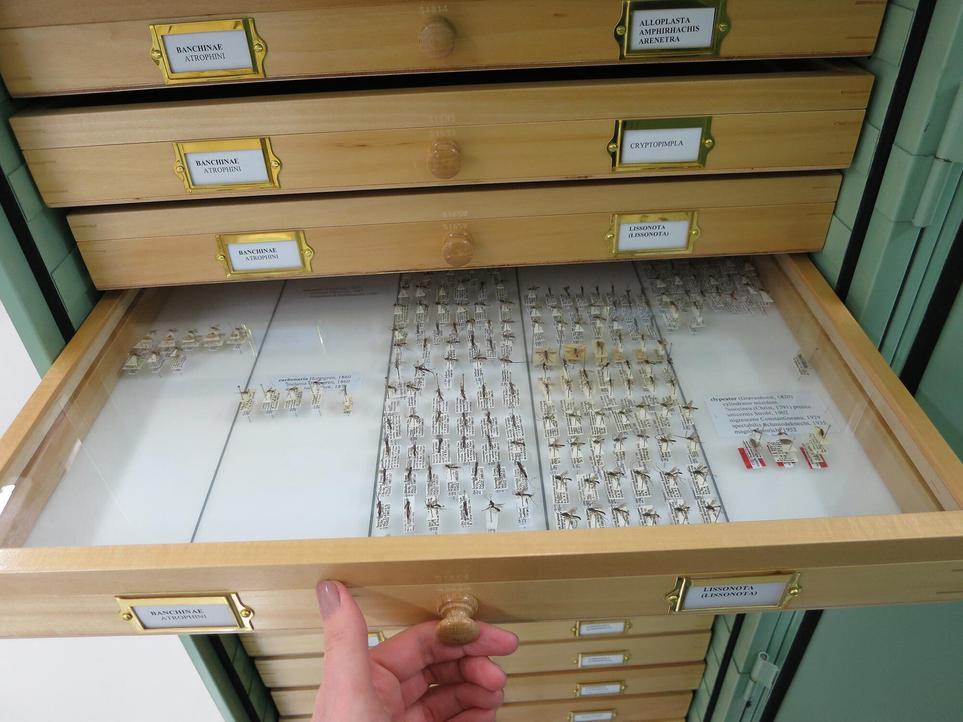
A plastazote lined entomological drawer in a metal cabinet, with parasitic wasps arranged in columns.
Unit trays
Within each drawer, plastazote-lined unit trays are the preferred storage method.
This is because:
- Unit trays allow much more flexibility and better use of space than the traditional method of lining each drawer with just one substrate
- You can use each unit tray to house a single species, so any appendages that drop off remain within the tray, making it easier to re-associate
- Unit trays can be easily removed from the drawer to examine specimens as a group, reducing time and risk around manipulating individual specimens.
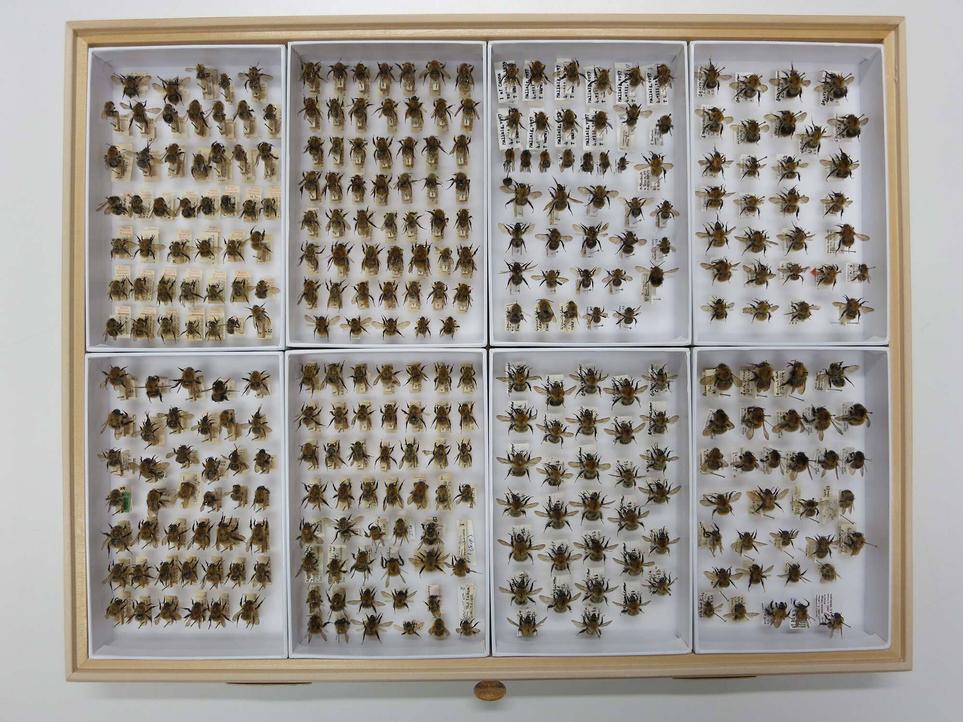
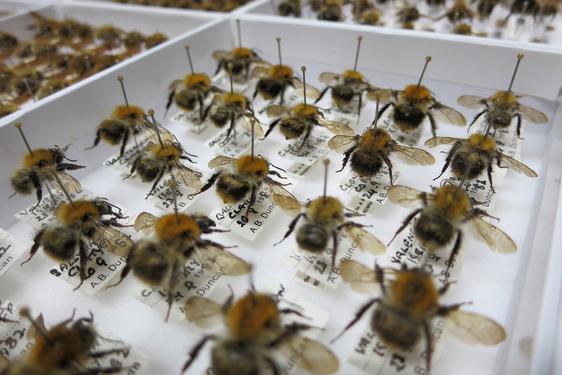
Unit trays containing bumblebees (Bombus pascuorum).
Cabinets
Ideally, specimen drawers should be housed within metal cabinets that are well-sealed, to provide protection from pests and light. Original, wooden cabinets do provide protection from light, but are not pest-proof. Cabinets can be positioned in rows and even stacked and bolted together to maximise space. Most modern drawers are also usually interchangeable within their cabinets, making it easier to insert new drawers into the sequence.
Tip: Always remove drawer lids very carefully! Some drawers have such a good seal on them that removing them too quickly will cause a vacuum and could damage the specimens.
Cabinets with shelf inserts provide flexibility, as they can house outsized drawers.
Store boxes
Many small or private collections are kept in store boxes. Most are wooden, but some are made from strong cardboard, covered in paper. The more modern store boxes generally provide better protection from pests and are now lined with plastazote rather than cork. They can be very useful for short term storage and for overflow or teaching collections.
Environmental control
Insect collections should be stored in a stable environment, where both humidity and temperature are controlled.
The standard conditions for entomology collections are:
- 20°C
- 50% (+/-5%) relative humidity
High humidity and warm temperatures will encourage mould to grow and provide ideal conditions for pests to thrive. These conditions should be avoided at all costs.
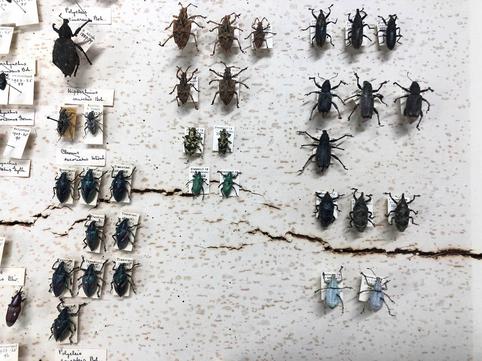
Example of an old drawer with a cracked based due to cork base and fluctuating temperature.
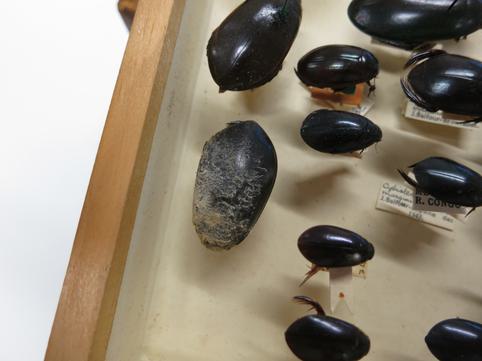
An example of a beetle specimen coated in mould.
Loans
Sometimes insect specimens need to be loaned to researchers or other institutions for research or display purposes. For example, when a researcher cannot travel to visit the collection and when digital alternatives (high-resolution images taken from different angles) are not sufficient or possible.
Watch this video to learn how to pack insect specimens for temporary loans.
Basic steps
These are the basic steps covered in the video for preparing a specimen loan:
- Transfer the specimens that are to be loaned into a suitable specimen box.
- Leave labels in the collection where you have removed the specimens. The labels should provide the details of the loan, including the loan number, number of specimens, the person and/or institution receiving the loan, and the date.
- Ensure specimens are secure in their new box. Cross-pin where necessary, for example to avoid specimens rotating on their pins. Secure cotton wool in the corners of the box to catch any parts that break off in transit.
- Complete the relevant outgoing loan documentation and photograph the loan.
- Seal the box within a polythene bag. This protects the specimens from pests during transit.
- Place the specimen box in a much bigger cardboard box. Ensure there is a minimum of 5cm of padding surrounding the specimen box.
- Place a copy of the loan form inside the cardboard box, on top of the padding and seal the box thoroughly.
- Label the box clearly with the borrower’s address and a return address and to notify handlers that the contents are very fragile.
International loans
For international loans you must:
- Check if your loan requires a permit or certificate under the Convention on International Trade in Endangered Species of Wild Fauna and Flora (CITES). You can check this information on GOV.UK and the Species+ website
- Complete the relevant customs documentation, including the CN22 customs form
- For loans for research purposes, state that the package contains “Dry preserved insect specimens, for scientific study only.”
Moving collections
Moving collections can be challenging, particularly if it is on a large scale. Consider the following:
- Ensure: Ensure all staff involved in the move understand the fragility of insect collections and know how to handle them
- Plan: If your collection is already arranged in taxonomic order, then number the drawers and cabinets. It is then much easier to keep them in the correct sequence when you move them. You do not want to move a drawer or box of specimens more times than necessary
- Use moving aids: Trolleys enable you to move multiple drawers at once, safely
- Slow and steady: Avoid uneven surfaces when using trolleys, to keep vibrations to a minimum.
Tip: Moving collections is a great opportunity to do a full pest inspection and spot and repair any loose or rotating specimens (also referred to as ‘spinners’).
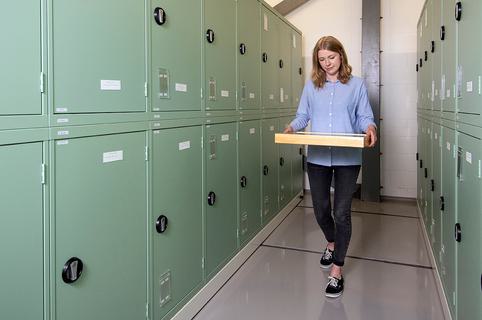
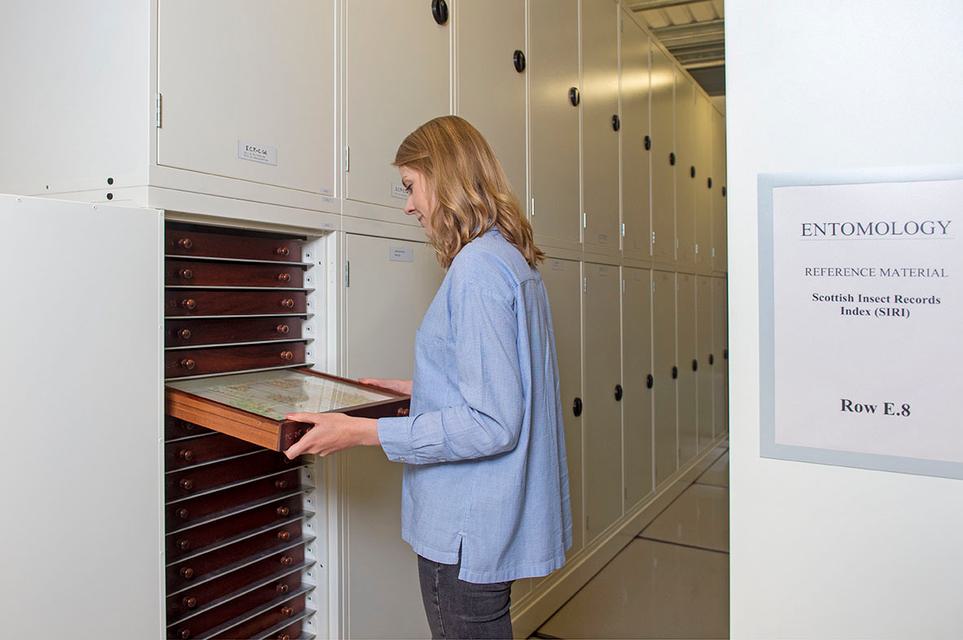
A curator carries a drawer of insect specimens.
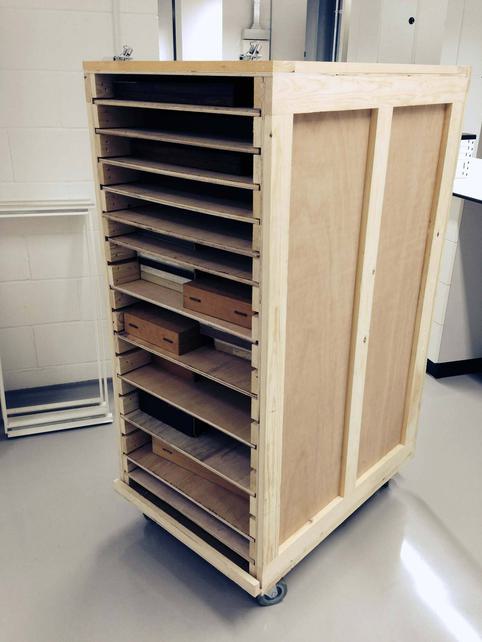
An example of the type of trolley used to move our entomology collection in 2014.
Additional resources
- Caspers, M. et al. 2019. Butterflies in bags: permanent storage of Lepidoptera in glassine envelopes Publication detailing methods of digitisation and curation of papered specimens.
- Neuhaus, B. et al. 2017. Collection, management and study of microscope slides
- Neumann, D. & Carter, J. 2018. Baseline standards for fluid collections
- Natural History Museum Conservation Centre - Standards in the Care of Wet Collections
- Animal and Plant Health Agency and Department for Environment, Food & Rural Affairs – Import or export endangered species: check if you need a CITES permit
Header image credit: Molly Wilders.
More in this resource
Why do museums collect insects?
Learn why we collect insects, and what they’re used for.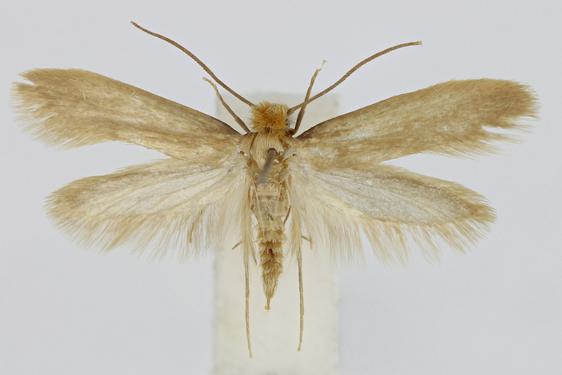
Identifying pests and managing infestations
Discover how to identify pests, and manage infestations.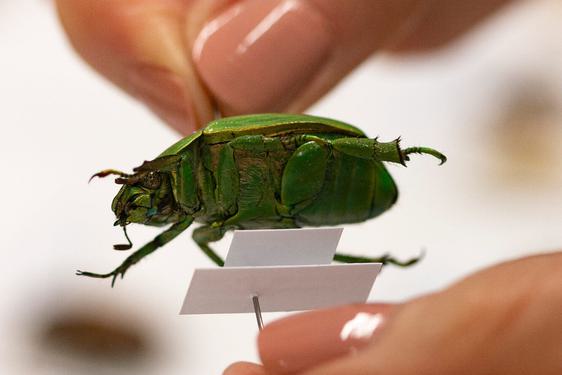
Specimen preparation and conservation
Discover how to prepare and conserve specimens.
Collections data
Find out how data around entomology collections is used.