
Museum Maker: Bird Safari
Head outdoors and see how many brilliant birds you can spot with the help of some bright binoculars! Learn how to make them here!
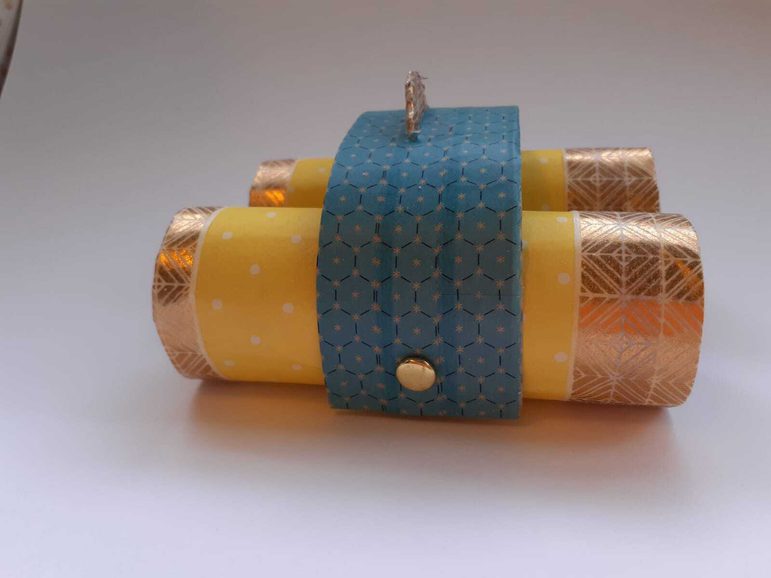
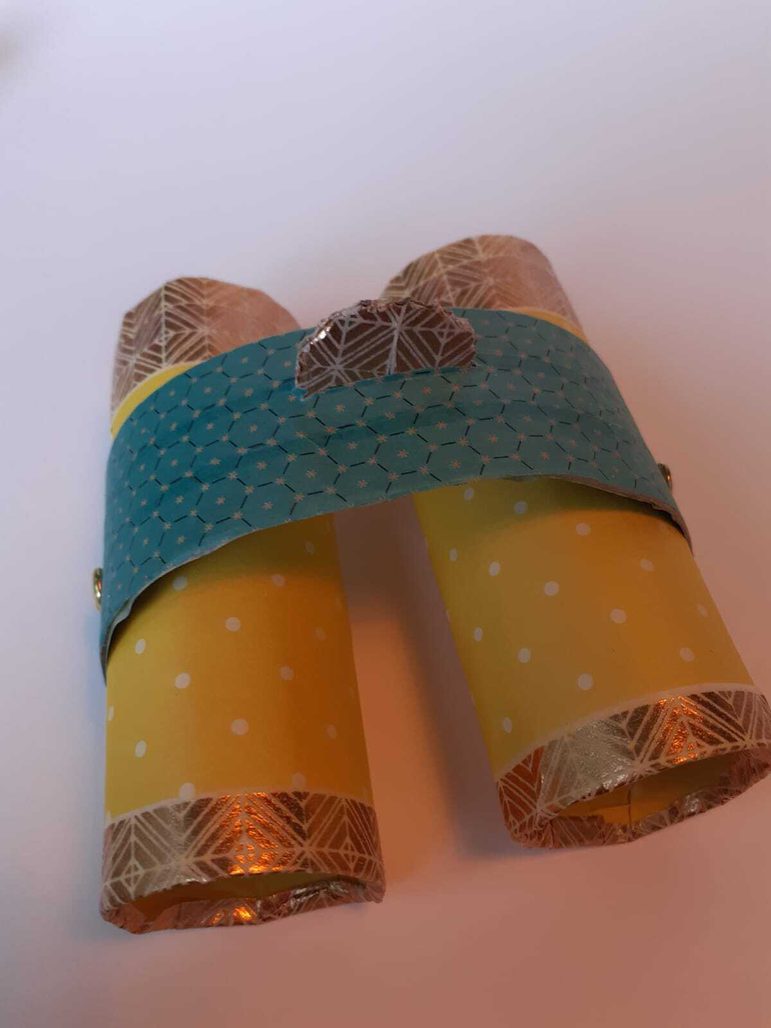
How to make Birdwatching Binoculars
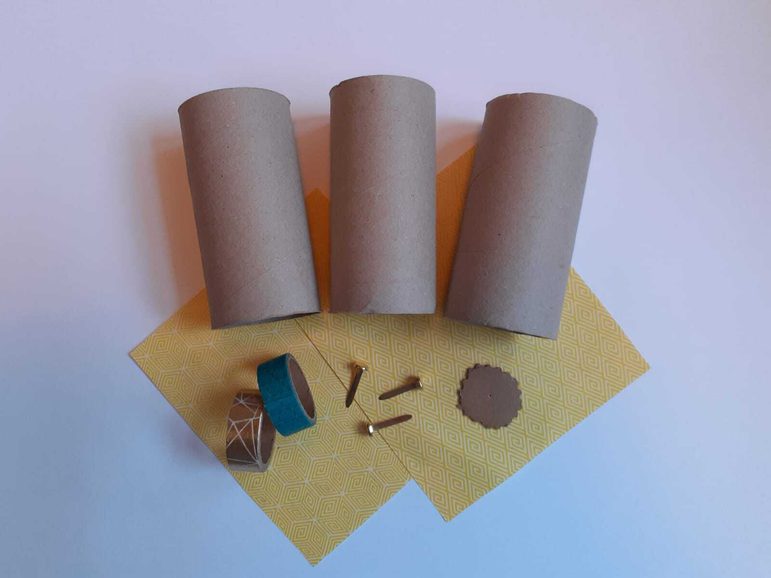
What you need
- A helpful adult
- 3 toilet rolls
- Coloured paper or paint
- Washi tape
- Rules
- A cardboard circle, about 3cm in diameter
- 3 split pins
- Scissors
- Glue.
What to do
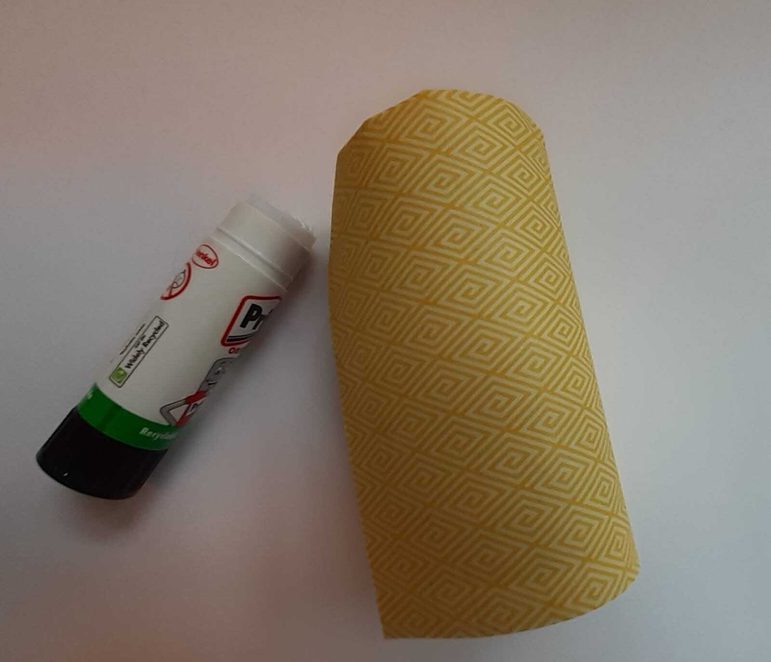
1. Cover two of the toilet rolls with coloured paper or paint them your favourite colour
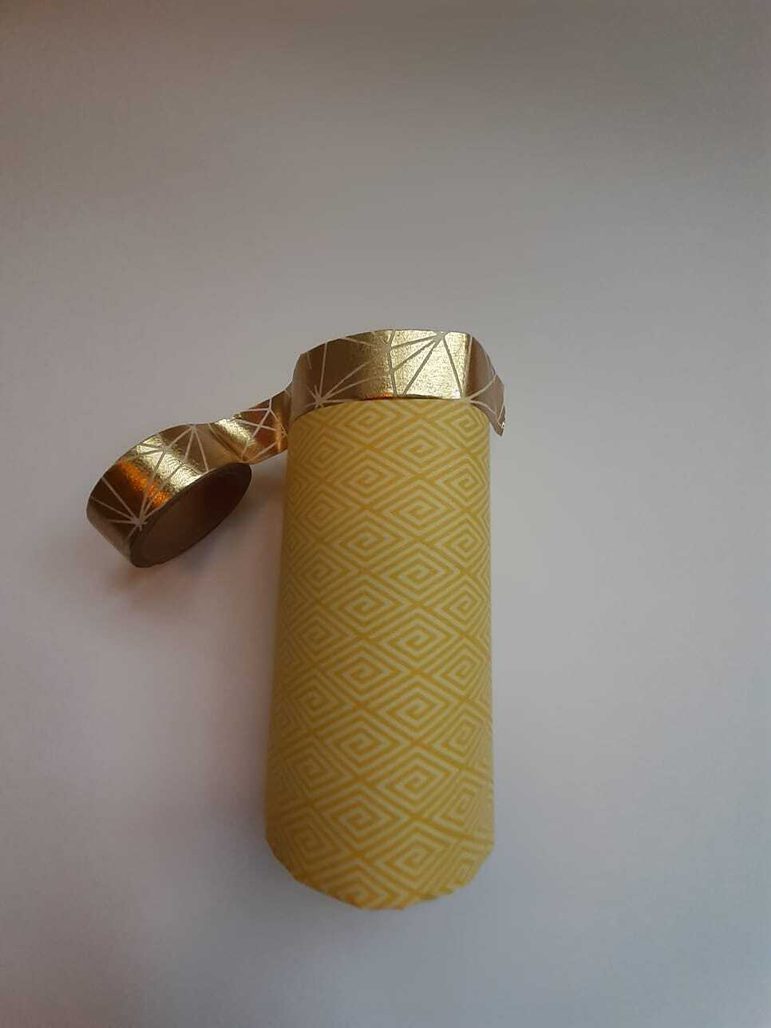
2. Stick Washi tape, in a contrasting colour, around the ends.
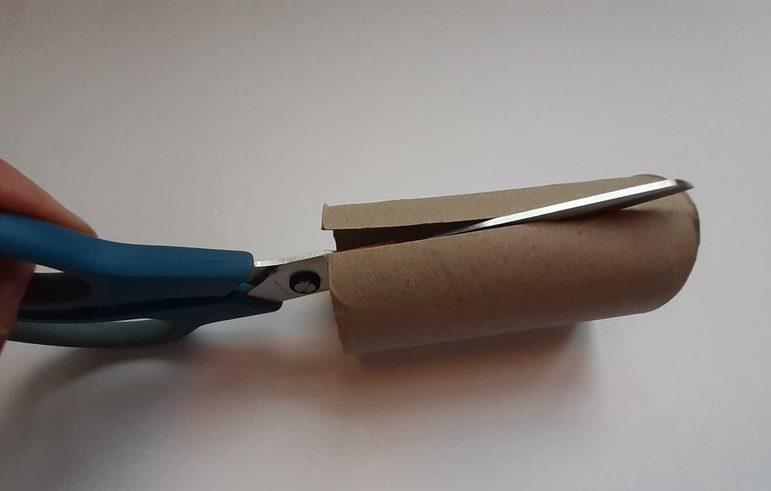
3. Take the third toilet roll and cut it in half lengthwise.
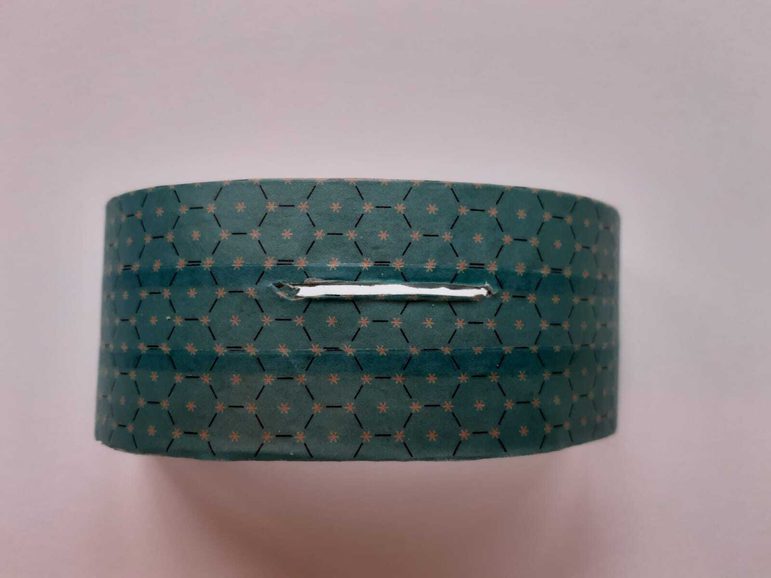
4. Measuring from the top of this roll, cut a strip around 4cm wide. This will become the top of the binoculars and can be painted or covered in washi tape.
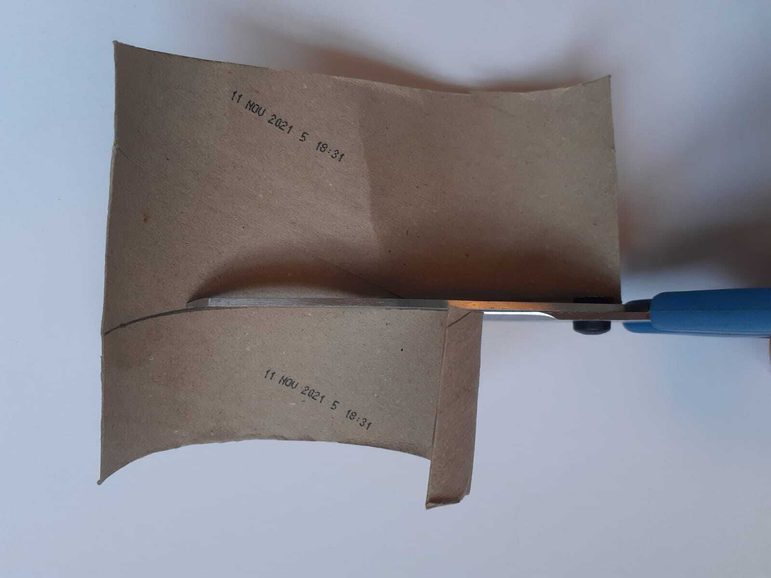
5. If you'd like to make a focussing wheel for your binoculars, cut a 3.5cm long slit in the top strip.
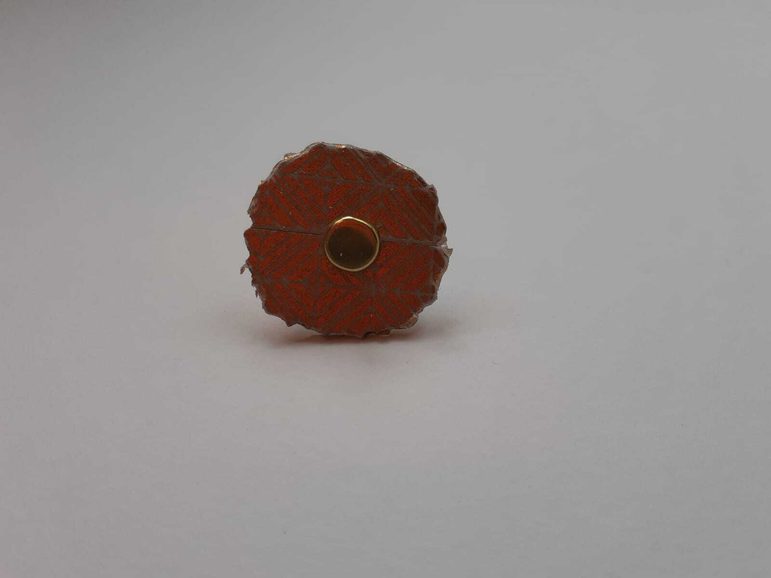
6. Cover or paint the cardboard circle and push a split pin through the centre. Make sure that wheel is able to rotate freely when turned.
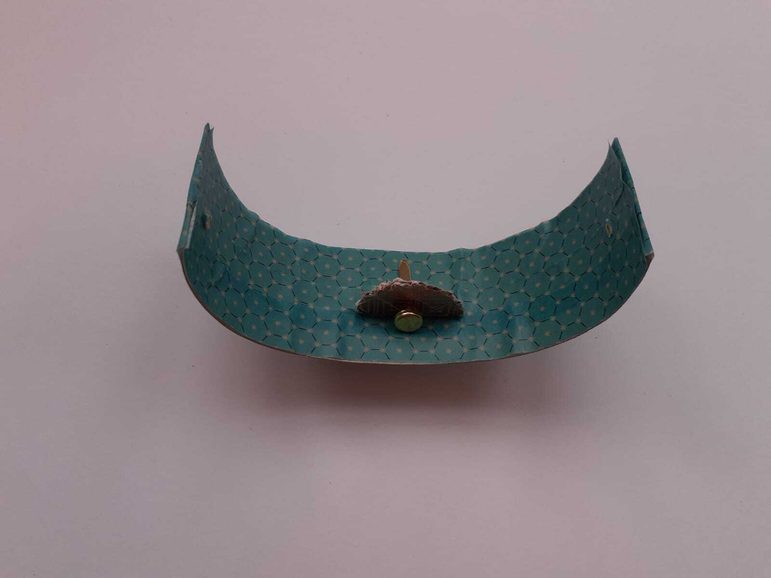
7. Push the wheel through the slit, with the split pin's legs on the underside. Tape the split pin into place.
8. Attach the top of the binoculars to the eyepieces either by gluing or fastening with split pins
Now your binoculars are finished! Take them outside and see which birds you can spot!
You might also like
- Schools resource
Meet the Vikings digital session - accompanying resources
A range of themed learning resources and activities to accompany our digital sessions on the Vikings. - Schools resource
Museum Maker: Make a champion’s rosette
Celebrate the champions you know – family, friends or even pets - by making them a personalised rosette! - Schools resource

Museum Maker: How to make an owl badge
We’ve teamed up with upcycling experts Ostrero and artist Bryony Knox to create a design for a cool owl badge – made from a fizzy drinks can! Try it out today.