Specimen preparation and conservation
On this page
Which preparation method is most suitable for your specimens?
Which preparation method is most suitable for your specimens?
Preparing specimens for dry-preservation is appropriate for the majority of insects, and is therefore the method we focus on in this training. Read the guidance and watch the videos in this section to learn how to prepare specimens for dry-preservation.
Other preparation methods are:
- papering - mainly used as a temporary method of storage and transportation when doing fieldwork
- microscope slides- for small insects, or small details of larger insects, that need to be examined under a microscope
- wet-preservation - for specimens in the immature stages with soft bodies or very small or fragile specimens (usually prepared in alcohol), or where DNA preservation is a priority (best prepared in absolute ethanol or kept frozen)
Read more about papering, microscope slides and wet-preservation in Preservation and storage methods and the additional resources.
Equipment
A preparation kit should contain the following items:
- pins – stainless steel insect pins in a range of sizes, including ‘continental’ and ‘micro’
- pinning block – for setting specimens and their labels to a standard height
- archival pen – for writing labels
- setting block – plastazote for setting specimens
- setting or spreading board – for setting specimens with wings spread, such as Lepidoptera (moths and butterflies)
- setting strips – for securing spread wings
- setting pins – for securing setting strips and positioning limbs and antennae
- scissors – for cutting labels and setting strips
- card mounts or card points – in standard sizes (13x30mm, 10x21mm, 6x17mm)
- mounting glue – for attaching specimens to card mounts or points
- paintbrush – for adding glue to card mounts or points and removing debris
- fine forceps – for manipulating specimens
- entomological forceps – for handling pinned specimens
- soft forceps – for handling wet specimens
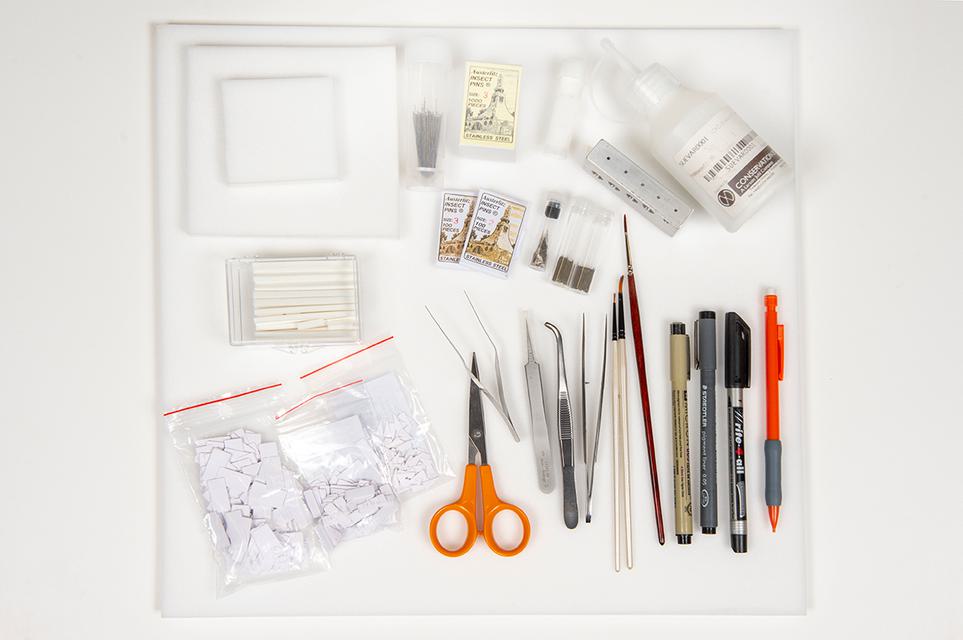
The various entomological equipment used in the preparation process.
Dry-preservation preparation methods
If your specimen is suitable for dry preservation, there are several different methods, depending on the size and type of insect. To pin or not to pin, that is the question! In general, if your specimen is smaller than 5mm it may be best to card point, rather than pin.

Examples of some of the most frequently used pin sizes.
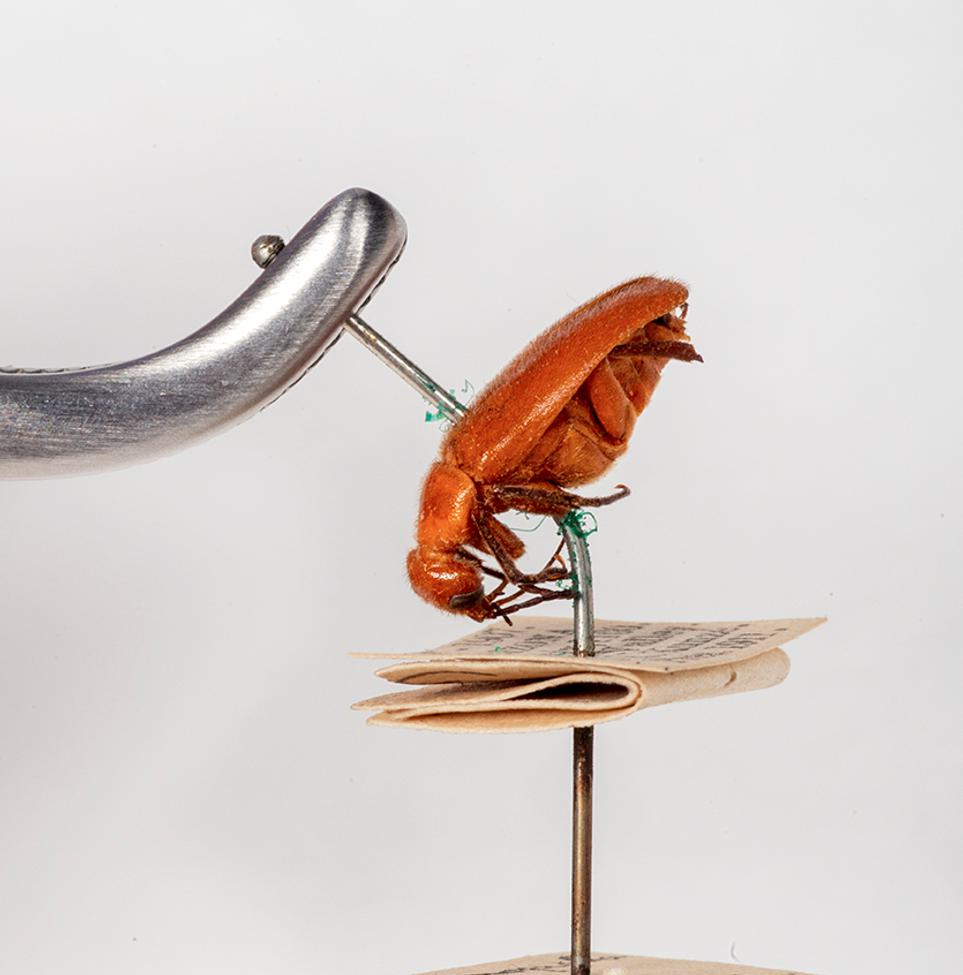
Direct pinning
Direct pinning involves inserting an insect pin directly through the body of the insect. The specimen labels are placed on the same pin, underneath the insect.
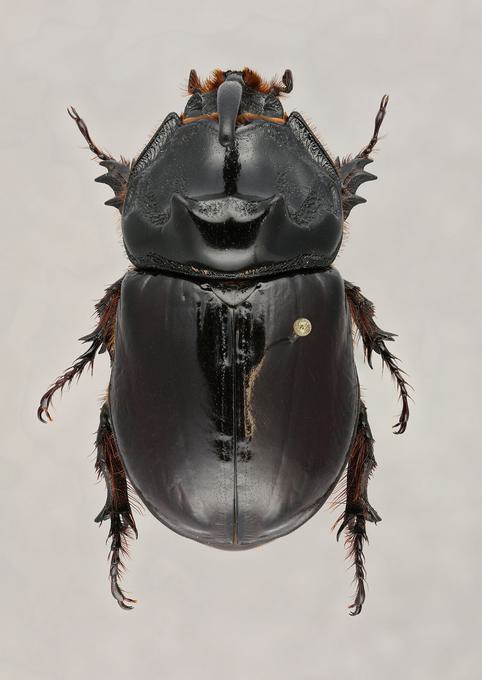
Example of pin placement on a direct pinned European Rhinoceros beetle (Oryctes nasicornis).
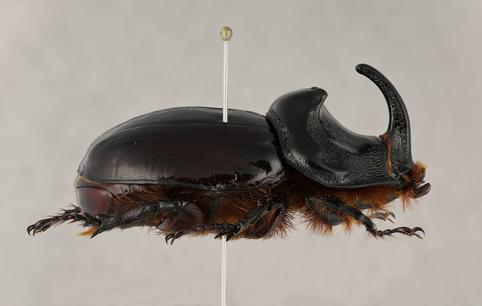
Example of pin placement on a direct pinned European Rhinoceros beetle (Oryctes nasicornis).
Pin placement is very important in direct pinning:
- Most insects should be pinned to the right of the midline, to ensure all characters on the left side are untouched. Lepidoptera (butterflies and moths) are an exception and should be pinned directly through the midline
- The pin should be inserted through the meso-thorax (the middle section of the thorax) and emerge between the legs. If a pin is pushed through where a leg attaches, it is likely to cause the leg to detach
- The plane of the insect’s body should be perpendicular to the pin
- Specimens should be placed at a standard height on the pin (25mm), to allow room for labels underneath
- Legs, wings and antennae should be positioned so that they are easy to observe, but not in a way that would make them prone to damage.
Tip: Use a plastazote setting block that is thicker than the length of your pins. Also, try covering the setting block in paper to provide a smoother surface and make positioning the legs much easier.
Watch this video on how to pin an insect from Purdue University to understand the key steps.
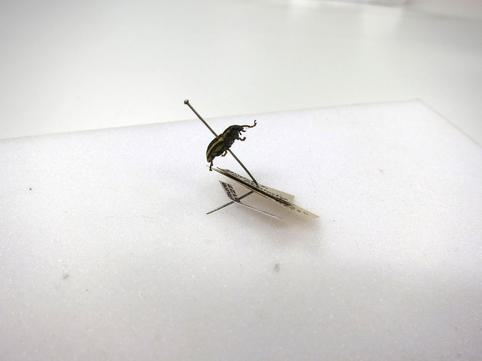
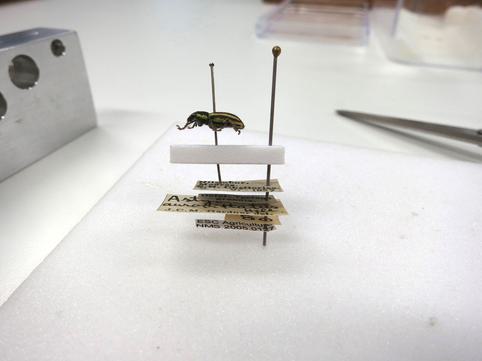
Micro-pinning
This method is commonly used for small Diptera (flies) and Lepidoptera (butterflies and moths).
- Insert a micro-pin into the top or side of the specimen, depending on what characters are needed for identification. Position the specimen half-way up the micro-pin
- Insert the micro-pin into a plastazote stage
- Insert a larger pin (Continental no. 3, 4 or 5) through the plastazote stage and position the stage to the standard height
- Pin the specimen labels through the larger pin, so they sit underneath the plastazote stage.
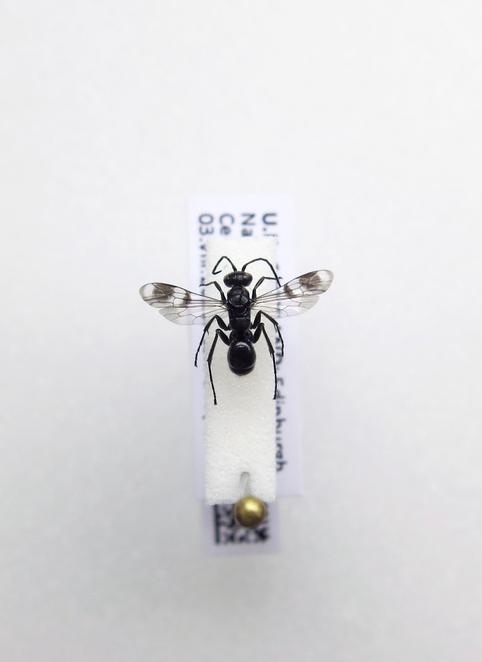
Example of micro-pinning.
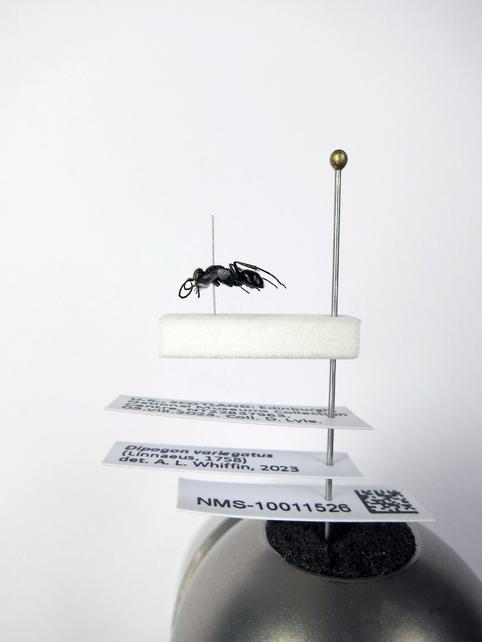
Example of micro-pinning.
Card mounting
Card mounting is favoured particularly for Coleoptera (beetles) because it protects all the appendages, as well as being pleasing to the eye. However, it obscures the characters on the underside. Therefore, you should identify the insect prior to mounting.
- Ensure the specimen is very relaxed (either freshly killed or placed in a relaxing box beforehand)
- Select a suitably sized card for your specimen
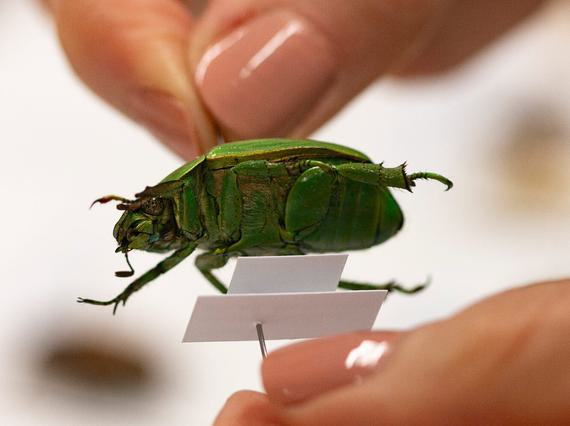
- Use a fine paint brush to apply mounting glue to the card and then carefully position the specimen on top. Use fine forceps to position the legs and antennae
- Once the glue has dried, use a no. 3 or 4 pin to pin the card, and a pinning block to set it to the standard height.
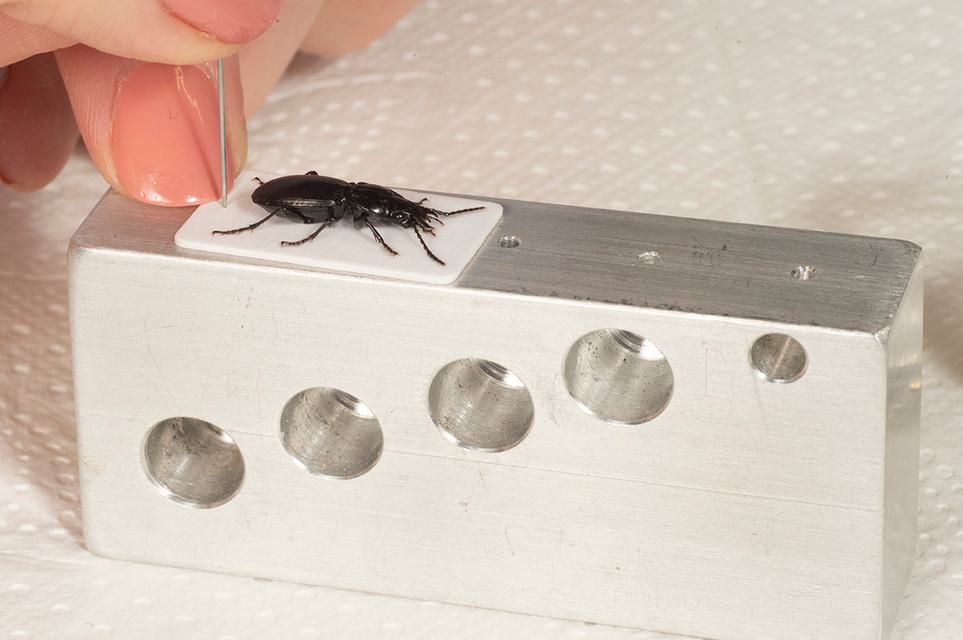
Example of card mounting.
Card pointing
Use card pointing for specimens with a body length smaller than 5mm.
- Select a suitably sized card point for your specimen
- Pin it with a no. 3 pin and position the card point to a standard height using a pinning block.
- Using forceps, slightly bend the tip of the card point downwards
- Add a very small amount of glue to the tip
- Attach your specimen. The right-hand side of the thorax should be glued to the tip of the point.
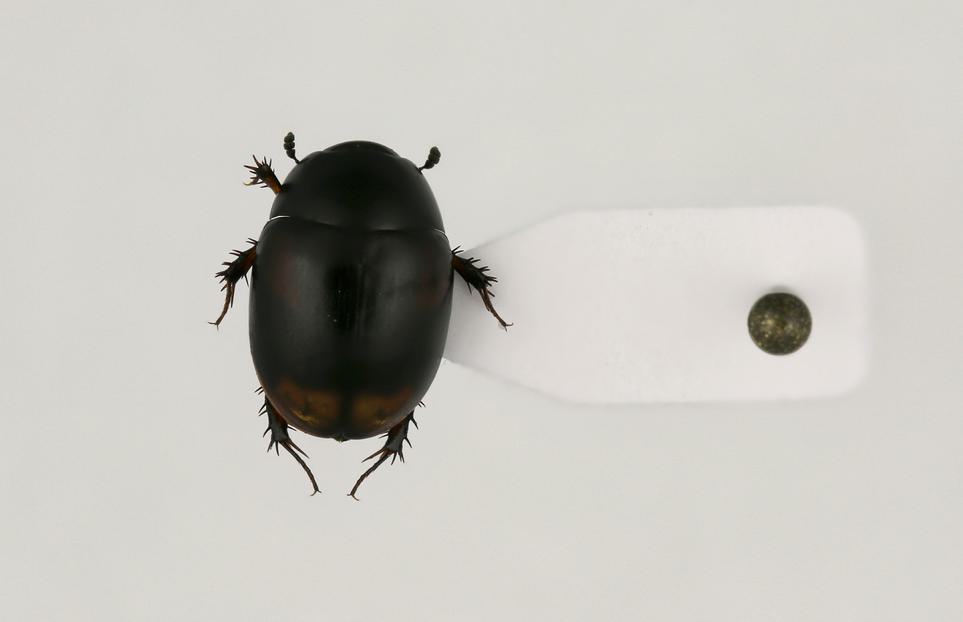
Example of card pointing.
Pinning and setting Lepidoptera (butterflies and moths)
When preparing Lepidoptera, position the pin directly through the midline and then set the wings.
- Use a setting board to secure the specimen and spread the wings out
- Set the wings so that the hind edge of the forewing is perpendicular to the midline of the body
- Set the antennae so it is parallel to the edge of the forewing
- Place setting strips (made of wax paper) over the wings and secure the strips with setting pins
- Use a small strip of plastazote to support the abdomen from below
- Allow at least 5 days for drying the specimen. Unless you have access to a drying oven (2 days, at 40°C). This period depends on the size of the insect
- Once dry, remove the setting pins and strips and gently pull the specimen out of the setting board. It is now ready for labelling.
A visual guide to pinning and setting
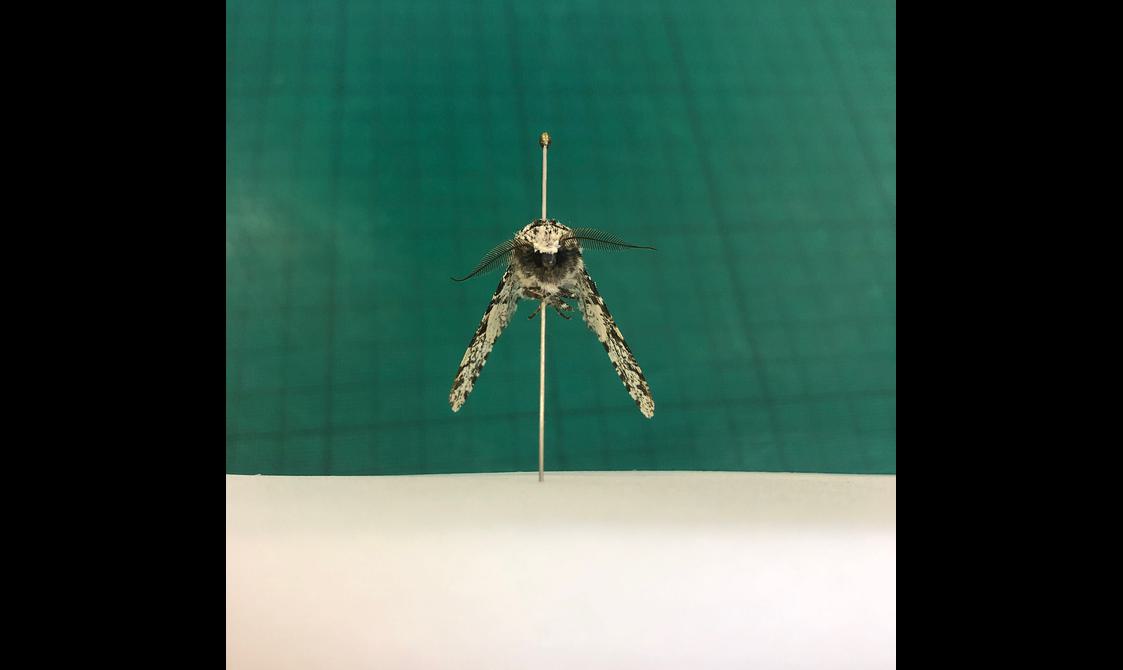
1. Pin the specimen through the centre of the thorax, positioning it two thirds of the way up the pin.

2. Secure the specimen.
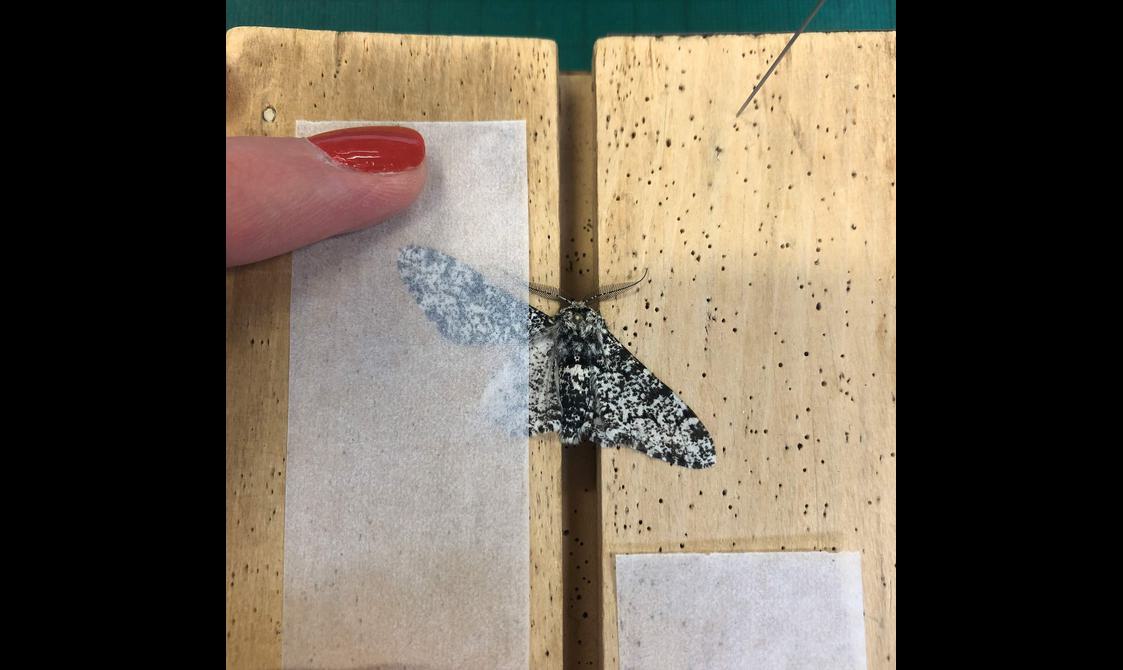
3. Spread the first wing.
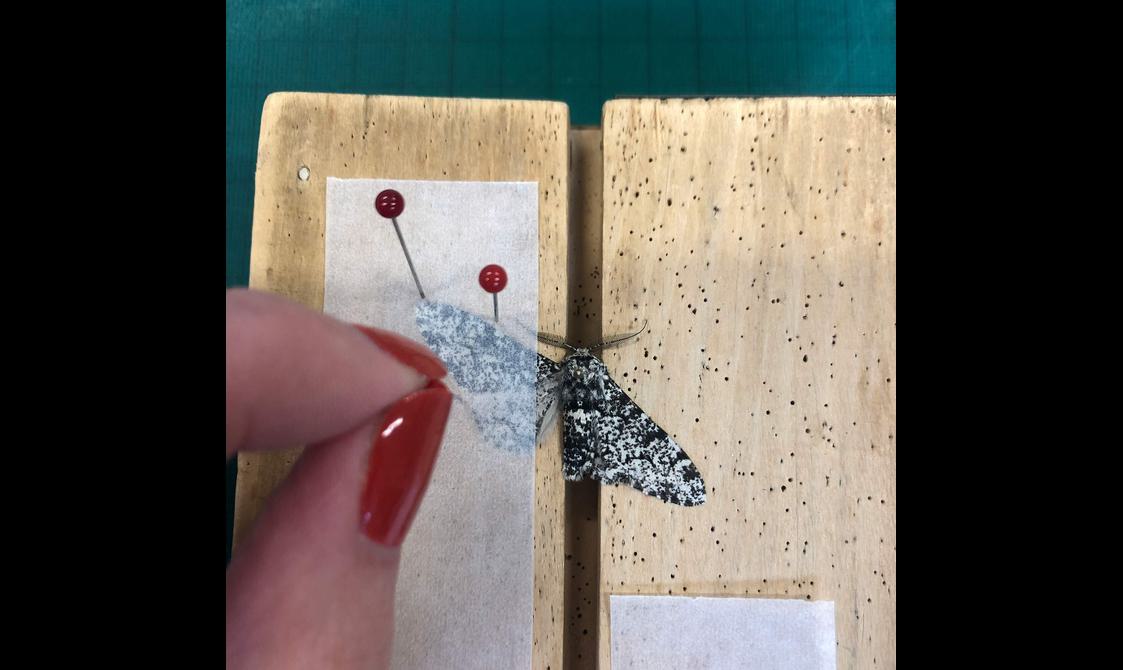
4. Use pins to secure the tape.
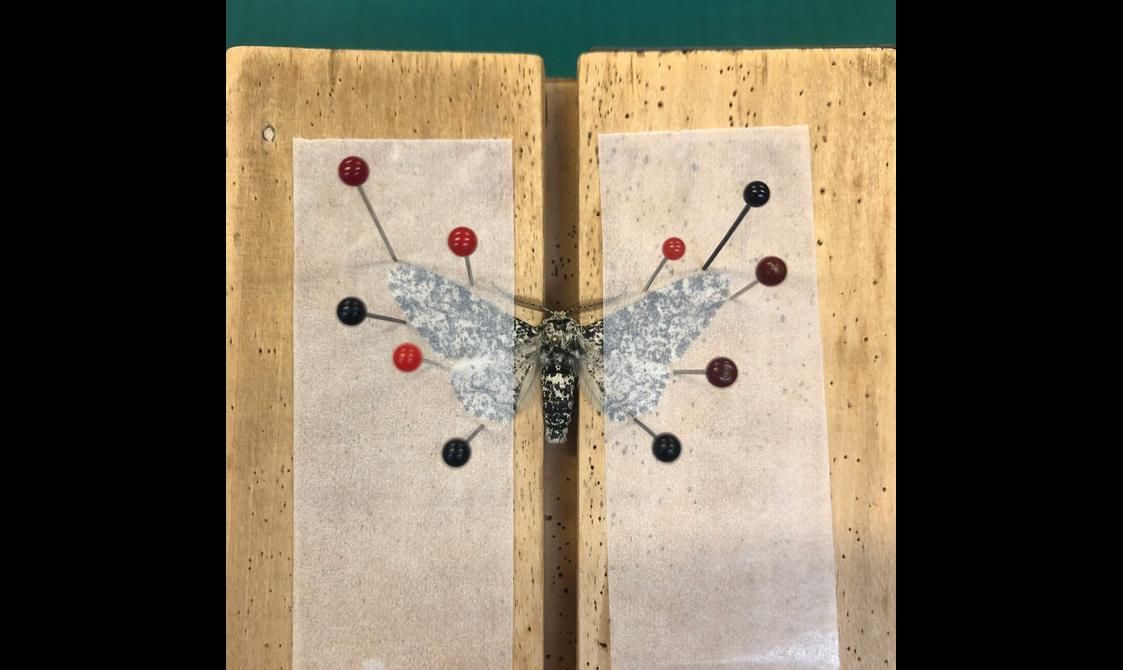
5. Repeat the process on the other side.
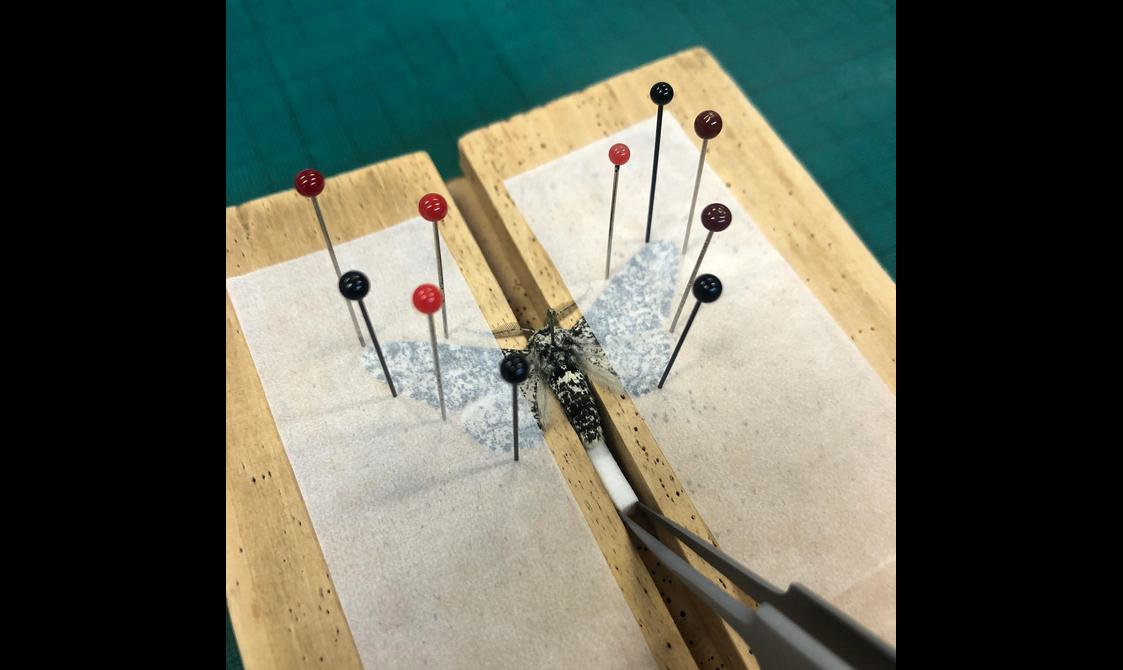
6. Use a small strip of plastazote to support the abdomen from below
Labelling
Provide the following information on the locality label:
- where – locality (place name) where the insect was collected
- how – collection method used, e.g. pitfall trap or sweeping
- when – the date it was collected
- who – name of collector
Provide the following information on the identification label:
- what – taxonomic name of the specimen
- who – name of the identifier, and year identification was made
Tip: Format your date with the month in roman numerals (e.g. 12.vii.2023). This will help avoid confusion later down the line, if incorporated with international material. Always put the year in full.
Remember to:
- Always use archival quality ink
- Use thick acid free card (at least 100 gsm)
- Set your labels to a standard height
- Ensure the labels are uniform in terms of the direction of the text
- Position the labels in line with the insect's body to save space.
Repairing specimens
Entomology collections are fragile and therefore very vulnerable to damage. Breakages can occur from vibrations, pest attacks or during specimen handling.
Example of a specimen with a bent pin and verdigris, in need of repair.
Watch this video to learn more about the various options for specimen repairs.
Broken specimens
If a specimen is damaged during handling, such as a leg or wing breaking off, then it is crucial to keep this part associated with the original specimen. However, if loose specimens or appendages are found in the bottom of the drawer or store box, only repair them if you are certain that they can be correctly re-associated. You don’t want to glue the wrong head onto a specimen!
There are two options for dealing with broken specimens.
If a broken fragment is large enough, it may be possible to carefully glue it back on the specimen. The preferred adhesive to use is Evacon R, a conservation grade glue that is water soluble.
However, it is often a safer option to place the broken piece into a capsule and attach this to the pin, below the specimen. Gelatin capsules are easy to pin through, hold the fragment safely, permit retrieval at any time and are available in a range of sizes. Be careful not to get these damp as they are water soluble.
Tip: Use a fine paint brush to pick up broken insect fragments. Dampen the brush slightly with distilled water if it does not work with a dry brush.
Bent or broken pins
Many old specimens are preserved on poor quality pins. Sometimes the pins bend or break, or there may no longer be a point at the end of the pin, so it does not stick into the plastazote.
This problem can be dealt with by re-staging the specimen. When doing this, always ensure that the labels remain in the same order as they were on the original pin.
Beetle specimen on a bent pin.
After cutting the pin and re-staging the specimen.
Verdigris
Verdigris is a waxy green substance that can form on specimens pinned with brass pins (or other alloys containing copper). It can be extremely destructive, growing through the body of the insect and sometimes breaking the specimens apart.
Deal with extreme cases promptly so the specimens may be salvaged.
If you can only see a small amount of verdigris, carefully brush it off with a fine paintbrush and monitor the condition of the specimens. Ensure the temperature and humidity of the store is stable, as this will arrest the development of verdigris.
If replacing the pin is necessary, then follow these steps:
- Use a high-quality entomological pin that is a size larger than the original pin, and pin through the original hole. This will help prevent the specimen from being too loose and spinning
- Use a pinning block to replace labels in the exact order as before, using the existing pin holes
- Once re-pinned, keep the original pin with the specimen. It can be attached below the data labels using a small piece of plastazote
- Finally, add a small label noting when the specimen was re-pinned and by whom.
Tip: If a label is loose on the pin, then remove it, flip it over and rub the area around the hole with the smooth part of your forceps – this reduces the size of the hole and prevents it rotating on the pin.
Read Conservation of Insect Specimens Affected by Verdigris by Garner et al, 2011 (p. 50) for more detailed guidance on pin removal methods.
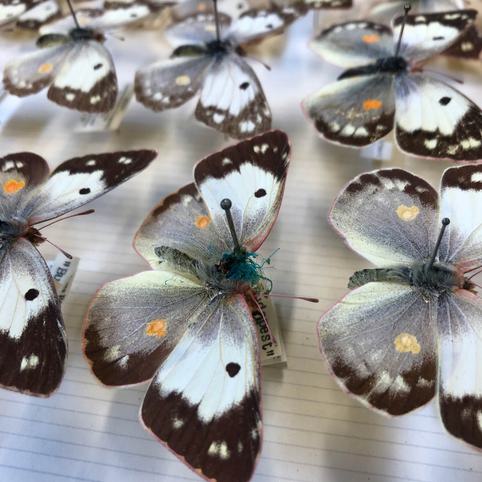
Butterfly specimen with severe case of verdigris.
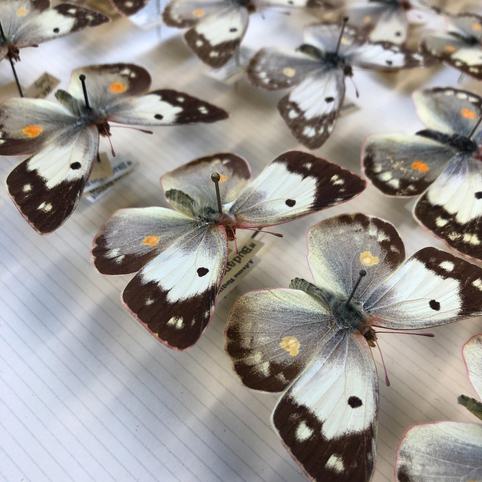
Butterfly specimens after pin replacement.
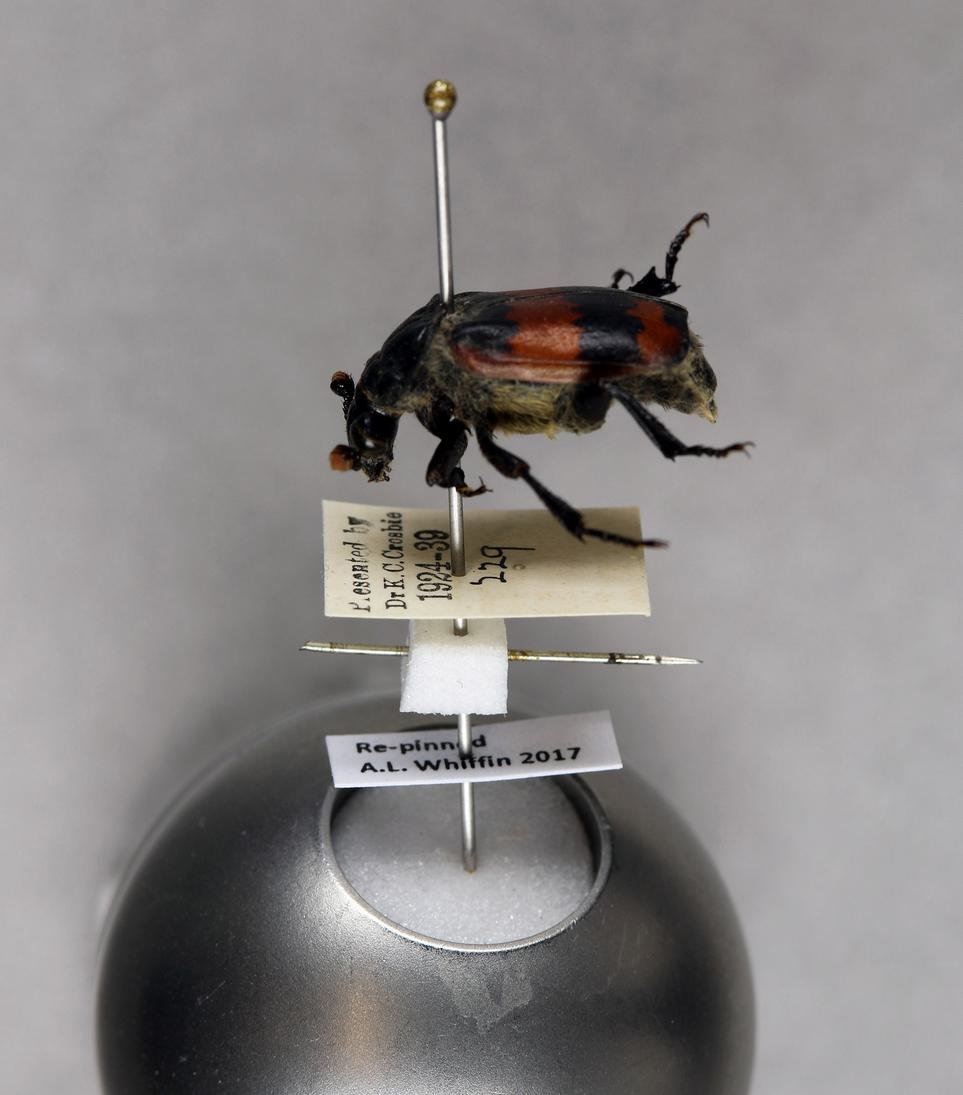
Example of a pin replacement, with original pin retained.
Naphthalene crystals
Transparent hexagonal crystals on specimens can be caused by the former presence of naphthalene. To deal with this problem, ventilate the drawer to encourage the naphthalene residue to evaporate off. Ideally do this in a fume cupboard. Use caution while the lid is removed to avoid physical damage and ensure quarantine procedures are followed to minimise the risk of pest attack.
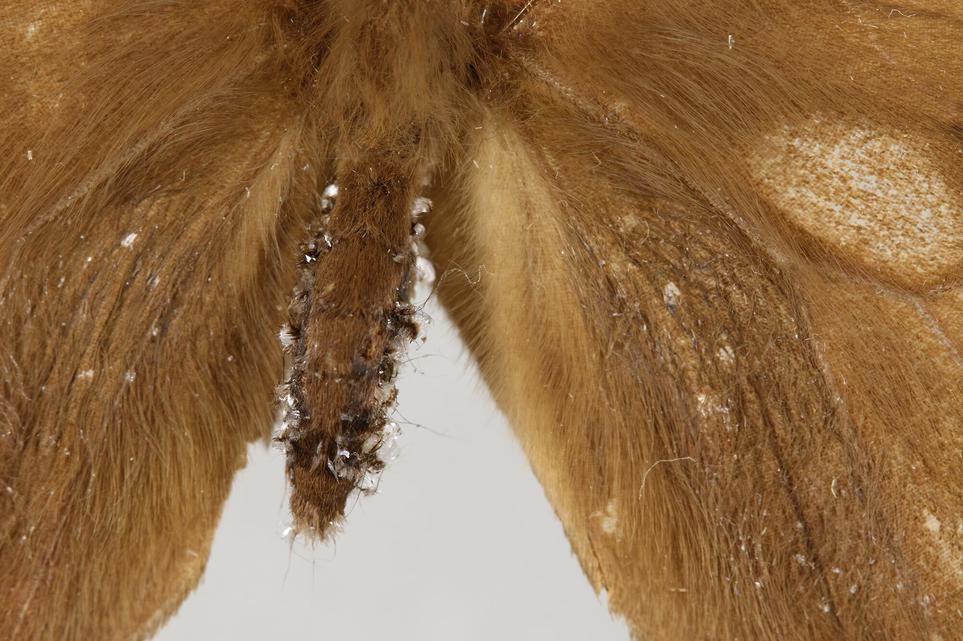
A close-up of the abdomen of a moth specimen with crystal formation.
Additional resources
- Garner, B. et al. 2011. Conservation of Insect Specimens Affected by Verdigris
- British Entomology and Natural History Society (BENHS) – Preparing Specimens
- Martin J.E.H. 1977. Collecting, Preparing, and Preserving Insects, Mites, and Spiders
- Manual of Afrotropical Diptera – download Volume 1 and refer to chapters 1, 2, 12 and 13 for an introduction to Afrotropical Dipterology and the collection and preservation of Diptera, plus a key to the Diptera families.
- Peter Oboyski - How to Mount a Moth
- Natural History Museum – Beginner’s guide to preparing Coleoptera
- Mark Tefler - How to card a beetle
- National Museum of Natural History – Collecting and Preserving Insects and Mites
- Raper, C – Collecting Insects
- Dipterists Forum – Entomological equipment suppliers
Header image credit: Molly Wilders.
More in this resource
Why do museums collect insects?
Learn why we collect insects, and what they’re used for.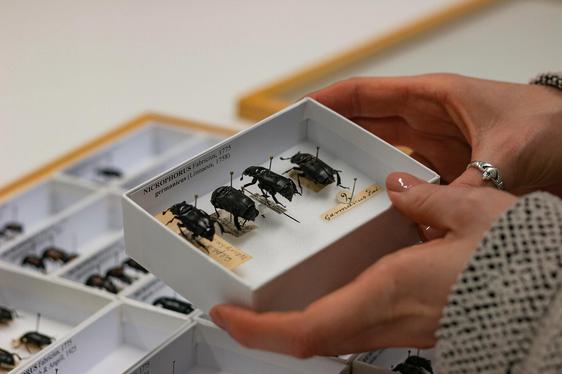
Preservation and storage methods
As insects are so diverse in their form, there are many ways they can be preserved.
Identifying pests and managing infestations
Discover how to identify pests, and manage infestations.
Collections data
Find out how data around entomology collections is used.